Wednesday, June 12, 2013

Give a Little, Part Six

In the Give a Little series, we look at quilts I made for Project Linus.  Today I have two more finishes to show you.


You saw this in September, after I pieced it.  It's 48" x 60".

The pieced blocks were donated and I added the solid squares to tie the jewel colors together.  It was out for quilting and it came back to me for binding, which I did using my machine binding method.


.
This was the block that started it.  I loved the skyscraper and I loved the colors.  Using this block, I pulled other blocks that coordinated.


Another of my favorite blocks.


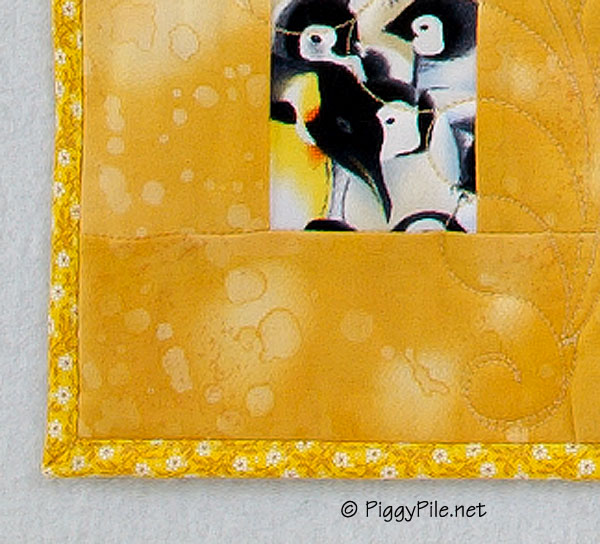
The woman that did the quilting is the same woman that quilted my penguin quilt.  She did a nice job and varied the quilting in the blocks.  Here you see four different motifs.


This one I did all on my own, start to finish.  It's 50" x 60".


Close-up of the nature-themed fabrics.  The bird fabric with the white background is from my stash.  I made a quilt out of it - I'll show it to you next week.  The rest of the fabric was donated, little bits of each, but when combined they made a pleasing whole.

I did utilitarian quilting - straight vertical lines and slightly wavy horizontal lines.

All my in-progress charity quilts are now done.  Whew!  Next I'm going to tackle my own three in-progress quilts.  Once those are done, I get to start something new.


Sunday, June 9, 2013

Give a Little, Part Five

As I mentioned in my last post, I'm on a mission to finish up some projects.  Today we'll look at a Project Linus quilt that was built by committee.  


This is the front of what I call Penguin Quilt.  It's 42" x 48".  Five of the blocks were donated; I made the rest.  I showed you the top last September before it got sent out for quilting.  The quilting is done and it came back home for me to do the binding.  


The inspiration for this quilt came from a few musical blocks donated by other guild members.  In this photograph, the top row center block was donated and I made the rest. 

I didn't have much to go with it in my stash (other than some grays and black/white), so I went shopping.  The penguin fabric was a perfect match.  I think I got that at JoAnn Fabrics.  I bought the yellow/black/white/gray circle motif fabric at Hobby Lobby.  It's penguin eggs, don't you think?

I bought the gray music fabric (lower right) to continue the music theme.  It was fun making more blocks.


The upper left and bottom right were donated.  Note the tiny musical motif in the bottom right block.


This is the back.  The center blocks were donated.  I pieced them and added some coordinating borders.  It's kind of a shock to see this on the back, since one side doesn't have anything to do with the other except for yellow.  But it sure gives versatility to the quilt with completely different looks on each side.


Here you can see the nice quilting that a guild member did.


Didn't she do a great job?


I'm not very good at quilting, but I've become proficient at 100% machine-sewn bindings.  I learned how to do it as a time-saving measure, plus I told myself it would make the charity quilts more sturdy.  This is the front of the quilt.  You sew on your binding like normal.  Then instead of turning it and sewing it to the other side by hand, you do the following.
  • Start in one corner.
  • Work from the front.
  • Turn the binding under and eyeball it so the folded edge extends a little to the left of the seam allowance.  You want the folded edge to cover the seam allowance.
  • Hold it in place with your fingers and sew on top of the binding, just barely to right of the seam that joins the binding to the quilt.  Sew for a few inches.
  • Turn under the next few inches and hold it even, then sew it.
  • Keep inching your way down the edge.
  • When you get to the lower edge, finish off that seam with some stitching in place.
  • Cut the threads, turn the quilt 90 degrees and do the same thing on the next side.
  • Continue until all four edges are done.


This is the back, neat as can be.  It took some practice, but now it works great for me and it can for you, too.


Friday, June 7, 2013

Holding Strong Against Temptation

Somehow I find myself in the midst of way too many sewing projects and I don't like it.  I decided not to start anything new (embroidery excepted) until I finish the three charity quilts and three of my own quilts that are in various states of completion.  So imagine the temptation put in my way when I went to Mill House Quilts recently to cash in a soon-to-be-expired gift certificate.


I'm a sucker for clothes pins and I couldn't resist Feedsack III by Sara Morgan for Blue Hill Fabrics.  Some of the fat quarters in the foreground are Feedsack II, some are Windham, and the others I can't tell. 


Background is The Dressmaking Collection - Vintage Notions by Amy Barickman for Red Rooster.  Amy wrote a book on vintage notions which I'm looking forward to reading.

The bale is Plaster of Paris by Stephanie Brandenburg for Frond Designs.


This Moda will be a cute binding.


Sew Retro Labels from makower uk has so much potential.  I'm going to use some of the little squares in their entirety, and some of them I'll cut apart and use pieces in various tiny projects.

Like I said, lots of temptation, but I'm holding strong.  This is my lure to finish what I started.


Tuesday, June 4, 2013

From the Vault - Spring Stained Glass Quilt

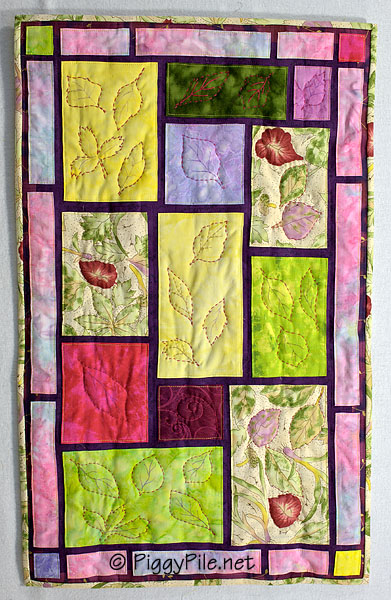
I made this quilt two years ago.  It's a small wall hanging - 16" x 26", inspired by a piece of stained glass.  I liked the composition and proportion of the "blocks".


This is the focus fabric, with a small sample of hand quilting around the leaves.  The fabric had a water-colory appearance, so I chose the border batiks with that same effect in mind.


This isn't a pieced quilt.  Instead, each component has its edges pressed underneath, then I topstitched along the edges through all three layers.  By using a dark background, it looks like stained glass.


I drew leaves to match the leaves in the focus fabric, and hand quilted around the edges.  On some of them, I embroidered the veins, but on most of them I just drew them in with a pigma pen.  From a distance, it looks fine.  I wanted to keep the leaves airy looking and simple; too much embroidery would have spoiled the effect.


The back.


Sunday, June 2, 2013

I'm Glad Target Sells Bananas

Target always has perfect bananas.  So I headed over there to buy some last Friday, and while I was there, I thought I would look around a little bit.  You never know what you're going to find in the clearance sections at the end of the aisles.


I found this ceramic lamp and lampshade for 50% off.  At 25.5", it's the tallest lamp I ever bought, not counting floor lamps.  They were sold separately, but obviously look good together.  

I know why the lamp was on clearance:  it's a 3-way lamp that hasn't learned to count that high.  Most 3-way lamps go low-medium-high-off.  My lamp goes on-on-off-off.  Since I'm not sure which one of the "offs" is the real off, I plugged it into a power strip and use that to turn it on.

There's no reason I can think of to explain why the shade was half off, except for it being my lucky day.


The base of this lamp was another Target clearance item I found earlier this year.  I couldn't find the right shade for it until today's trip to the antique mall where I found this fiberglass shade from the 1950s.  I know you can see the black part of the lamp where the bulb goes, but it only bothers me a teeny bit.  

This shade reminds me of a 3-week camping trip my family took when I was a child.  We went to Mount Rushmore, Yellowstone, and other places I don't remember.


The desert side.


 Maybe Alaska?


 Maybe Wyoming?