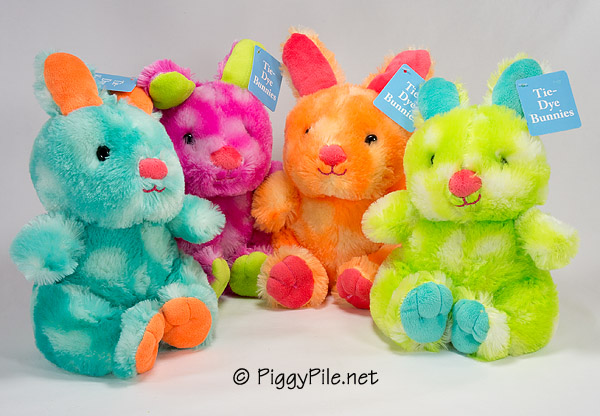

Monday, February 29, 2016
Monday is Fun Day - Tie-Dye Bunnies
Friday, February 26, 2016
Tutorial - Book Covers
I like using my old-fashioned, hold-in-my hands dictionary. But the cover is ugly and never matches any of the decorating in the room it sits in. After years and years, I finally got the idea to put a new cover on it.
 I bought this role of hand-made paper at World Market for only $3.

 Here's the "before" cover - all plain and functional. Not to mention I hate red.
 The length of the paper was just fine, but the height needed a little trimming. I wanted 2" of paper extending out from the top and bottom edges of the dictionary.
Then on the right side of the paper, I drew a faint line 2" in from those top and bottom edges.

 Fold along those lines.

 Set the book on its spine and fold one edge over the front cover. Keep that edge turned under, then lay the book down and fold the other edge over the back cover.
 Tuck the covers inside the folded edges.
You see that gap? I'm going to consider putting double-sided tape in there some day. But first I want to use the dictionary as is, and see if I really need tape or if it might be a hindrance. I'm afraid if I tape it, the paper won't slide smoothly over the book when I open and close it.
If I had used a lightweight gift-wrapping paper with no texture, I'd have taped it right away. But because my paper is rough and full of texture, when I close the cover, the gap seals up nice and tight and stays that way.
 Finished product.

 This paper has a really large-scale print, so the front has one design...

 ... which is not repeated on the back.

 Both sides are spelled "p-r-e-t-t-y".
 I'm looking forward to getting lots of use out of my "new" dictionary.
Then on the right side of the paper, I drew a faint line 2" in from those top and bottom edges.
You see that gap? I'm going to consider putting double-sided tape in there some day. But first I want to use the dictionary as is, and see if I really need tape or if it might be a hindrance. I'm afraid if I tape it, the paper won't slide smoothly over the book when I open and close it.
If I had used a lightweight gift-wrapping paper with no texture, I'd have taped it right away. But because my paper is rough and full of texture, when I close the cover, the gap seals up nice and tight and stays that way.
Tuesday, February 23, 2016
Just Sew
This project started with a tambourine.
 Country Sampler's special issue magazine Boho Style was what got me going. They had a tambourine with long strips of fabric tied to the edges. Not sure what they were going to do with it, but I thought it would look good hanging from a wall.

 I didn't have a tambourine, so I decided to use a 14" quilting hoop instead. I thought it would look silly to have fabric hanging from the edges when there was a big open space in the middle, so I decided to do a fused applique project instead.
First, I decided on what I wanted to say, then I drew letters to fit the scale of the hoop.

 Then I picked background fabric - with a sewing theme, naturally.
 Then I flipped my letters upside down, laid the adhesive side of the fusible on top of them, and traced them.
This whole process associated with fusing - reverse the image, figure out which side to trace on, blah, blah, blah, always takes me awhile to figure out. If I did it often enough, I wouldn't have to use my brain so hard. (I got good at paper piecing and no longer have to look up how to do that.) But in the meantime I wrote up fusing directions for myself and paper clipped them to the fusible stuff.

 Success! I did a test letter first, to be sure I was doing it correctly.
 Letters cut out, paper peeled off, and placed within the hoop prior to fusing.
 After fusing, I needed to stitch along the edges. Using black thread would have been too boring, so I decided to use a different color thread for each letter. I'm not a big fan of satin stitching - it takes too long and looks unappealing to me. But I think in this case it provided just the right combination of delineation and fun.
Besides, something was telling me to just sew, so sew I did.
 On the back, I trimmed the excess fabric to one inch, then did a gathering stitch. I want to make sure the fabric stays taut in the hoop, so I didn't want to use any glue between the hoop and the fabric in case I need to do any adjusting over time. This way I have a little bit to grab onto and pull in case I need to cinch it up.

 I'm hanging this on the wall in my sewing room. And now, time to get to it!
First, I decided on what I wanted to say, then I drew letters to fit the scale of the hoop.
This whole process associated with fusing - reverse the image, figure out which side to trace on, blah, blah, blah, always takes me awhile to figure out. If I did it often enough, I wouldn't have to use my brain so hard. (I got good at paper piecing and no longer have to look up how to do that.) But in the meantime I wrote up fusing directions for myself and paper clipped them to the fusible stuff.
Besides, something was telling me to just sew, so sew I did.
Monday, February 22, 2016
Monday is Fun Day - LED Lantern

Thursday, February 18, 2016
Quilt Finish - Froga
This morning I finished my Froga quilt.
 It's named Froga because the focal point is a frog doing yoga. It's a small quilt, 21" x 23", that I made as part of my Miniature Quilt Club. I took my inspiration from Cathy Gaubert's Ticker Tape Quilt, from her book "Pretty in Patchwork: Doll Quilts".
It was FUN to make. Everything except the frog and the word "Simplicity" is from my scrap bags. I want to make another quilt in this style, as soon as I find interesting focal fabric. That will be high on my shopping list at the International Quilt Show in April.

 I fussy cut some of the scraps to play up the yoga theme. The layer of flowers above the frog buffers the enthusiastic duck drumming. I had a smidgen of recycling-themed fabric left - that's the "Save Energy" square to the right of the duck.
The directions called for using a glue stick or other adhesive to attach the scraps to the background. I didn't want a glue stick gumming up my sewing machine innards, nor did I want the stiffness of fusible web. So I used stickpins as my basting.
When I made my sandwich, I put safety pins only on the white fabric, then removed whatever pin (stick or safety) was in my way as I did the vertical rows of quilting. Some of the rows aren't the straightest, but I was trying to hit all the edges since the fabric is raw edge and I didn't want too big a hunk flapping out there on the edges.

 Butterflies and hearts and flowers are fussy cut to fit in with a mindful frog...
 ... but other scraps were chosen purely for their color.
 I did a different kind of binding than I usually do. My usual is a continuous binding, where I piece the strips together with a 45 degree cut on each end. Then after stitching the binding to the quilt, I have to deal with seaming together the two open ends. Yuk.
Today I was in a hurry since I wanted to take this quilt for show and tell at my Modern Quilt Club this morning. And I only had 90 minutes to bind it, make a sleeve and label, and attach said sleeve and label.
So I did NOT do continuous binding. I bound one edge at a time. First I did the sides and left a raw edge at the top and bottom. Then when I sewed the top and bottom bindings on, I folded under the ends and it made a nice neat edge to encase the raw edges from the side bindings.
I'm going to use this method on all my miniature quilts - so much faster. And I'm really into machine stitching my binding, instead of hand stitching it.
 On the back you get a better look at the frog yoga. I only had 1/2 yard, so that's why I pieced the green/black/white floral onto the upper edge. Then I used that same fabric for the sleeve.
 The label.
 And a pig doing savasana.
Hey - aren't your eyes supposed to be closed during this pose?!?
It was FUN to make. Everything except the frog and the word "Simplicity" is from my scrap bags. I want to make another quilt in this style, as soon as I find interesting focal fabric. That will be high on my shopping list at the International Quilt Show in April.
The directions called for using a glue stick or other adhesive to attach the scraps to the background. I didn't want a glue stick gumming up my sewing machine innards, nor did I want the stiffness of fusible web. So I used stickpins as my basting.
When I made my sandwich, I put safety pins only on the white fabric, then removed whatever pin (stick or safety) was in my way as I did the vertical rows of quilting. Some of the rows aren't the straightest, but I was trying to hit all the edges since the fabric is raw edge and I didn't want too big a hunk flapping out there on the edges.
Today I was in a hurry since I wanted to take this quilt for show and tell at my Modern Quilt Club this morning. And I only had 90 minutes to bind it, make a sleeve and label, and attach said sleeve and label.
So I did NOT do continuous binding. I bound one edge at a time. First I did the sides and left a raw edge at the top and bottom. Then when I sewed the top and bottom bindings on, I folded under the ends and it made a nice neat edge to encase the raw edges from the side bindings.
I'm going to use this method on all my miniature quilts - so much faster. And I'm really into machine stitching my binding, instead of hand stitching it.
Hey - aren't your eyes supposed to be closed during this pose?!?
Subscribe to:
Posts (Atom)