Whew! I'm glad to be finished with my Elephant Pillow Quilt. It all started with a pillow I bought to put on the slipper chair in my sewing room. The pillow went great with the coral chair, but since it sits in a sunny window and I didn't want the chair to fade, I made a quilt to cover the upholstery. I'd rather sacrifice a quilt than the chair.
This is the elephant side of the quilt, with fused applique elephants.
Here is is, draped over the chair. The elephant says "Put the pillow right here!"
Like so.
The elephant side has the label.
This is the patchwork side, the first side I made. It's what I initially considered the front, until the elephant side came to be and then I stopped calling them front and back. I like both of them equally.
These are my three favorite fabrics. The upper left is flannel. The lower right is what the fused elephants are made from. The peacock fabric is my absolute favorite. I have another peacock fabric that I'll be using in a quilt after my next project, an apron.
Here's the patchwork side with the pillow, and a coordinating rug. This is the side I'm going with for now.
I finished my wool bird applique last week, but couldn't make a label because I couldn't think of a name.
I asked my husband what he thought I should name it and he said Wonder Bird. Knowing my struggle, he gave me the perfect name, because I'd been wondering what kind of bird it was.
I don't usually like a cotton border on a wool project, but this Kim Schaefer fabric was just perfect.
The pattern is "Birds and Berries" by Angela Lawrence. The pattern is for a wool pillow, but I wanted a little quilt instead.
I've already talked about all the steps along the way, so I don't have much to say about it now.
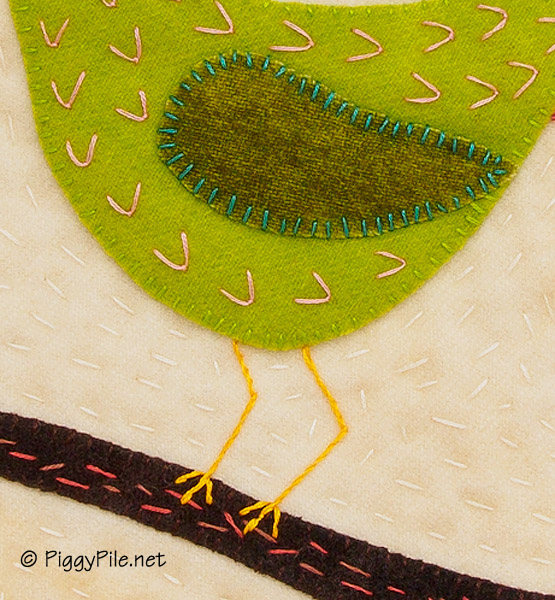
This photograph shows the variety of embroidery I did, along with the straight-stitch hand quilting.
The legs are a little puny and spiky, but wool legs would have been too fat.
The back.
The label, with a fussy-cut bird wondering about something.
I hadn't originally planned on doing any embroidery on my wool bird applique project. I was going to do some beading, but the jury's still out on that.
After I sewed all the edges down and took a good look at the project, I judged it colorful, but boring. That's when I decided that embroidery could add some strokes to the piece, like coming back with a fine brush over a painting to add detail. In the upper left you see two berries that are plain, and one that has French knots.
The left side of the brown branch at the bottom has "bark" while the right side doesn't. After I got this far, I decided I liked it enough to go forward with more.
The berries are done, except for the stems. The tail feathers are perhaps done. If I add any beads, this will be where it happens. The straight stitch on the tail feathers was my second embroidery attempt in this area, after trying the feather stitch. That looked too messy, so I pulled it out and replaced it with one strand of floss, in the simplest stitch possible, to add just a hint of direction.
I started adding "feathers" to the bird body using a modified scallop stitch; more to come. Eventually the bird will have legs, but first I want to finish the bark on the branch.
All the while I'm sewing this thing, ideas are percolating for how to finish it off, and what means of display I'll use. Right now, it's too soon to say.
This project started with a tambourine.
Country Sampler's special issue magazine Boho Style was what got me going. They had a tambourine with long strips of fabric tied to the edges. Not sure what they were going to do with it, but I thought it would look good hanging from a wall.
I didn't have a tambourine, so I decided to use a 14" quilting hoop instead. I thought it would look silly to have fabric hanging from the edges when there was a big open space in the middle, so I decided to do a fused applique project instead.
First, I decided on what I wanted to say, then I drew letters to fit the scale of the hoop.
Then I picked background fabric - with a sewing theme, naturally.
Then I flipped my letters upside down, laid the adhesive side of the fusible on top of them, and traced them.
This whole process associated with fusing - reverse the image, figure out which side to trace on, blah, blah, blah, always takes me awhile to figure out. If I did it often enough, I wouldn't have to use my brain so hard. (I got good at paper piecing and no longer have to look up how to do that.) But in the meantime I wrote up fusing directions for myself and paper clipped them to the fusible stuff.
Success! I did a test letter first, to be sure I was doing it correctly.
Letters cut out, paper peeled off, and placed within the hoop prior to fusing.
After fusing, I needed to stitch along the edges. Using black thread would have been too boring, so I decided to use a different color thread for each letter. I'm not a big fan of satin stitching - it takes too long and looks unappealing to me. But I think in this case it provided just the right combination of delineation and fun.
Besides, something was telling me to just sew, so sew I did.
On the back, I trimmed the excess fabric to one inch, then did a gathering stitch. I want to make sure the fabric stays taut in the hoop, so I didn't want to use any glue between the hoop and the fabric in case I need to do any adjusting over time. This way I have a little bit to grab onto and pull in case I need to cinch it up.
I'm hanging this on the wall in my sewing room. And now, time to get to it!
This weekend I finished my quilt with the two dogs. I'll eventually explain the name, so hold that thought.
It's a small wall hanging, 17" x 30".
This part of the quilt is from a pattern by Stephanie Nordlin, named Sirius Fun. You make two dogs, cut them in half, then swap their parts.
I did a satin stitch with embroidery floss for the nose, but thought it easier to glue on those eyeballs instead of using little pieces of black fabric like she did.
The dogs were done using fused applique. I scribble stitched the edges with matching thread, then free-motioned in black around the outer edges to add just a bit of dimension.
I didn't want two tiny quilts with no borders, which is what the pattern showed. Nor did I want to just stick two dogs together on one quilt with nothing in between.
So I added some large borders and four log cabin blocks. The dog print fabric was my focus fabric. I used it as the basis for my color choices as well as the fussy cut centers of the log cabins. Two of the featured dogs are in this large top block, framed in warms colors...
... and the other two are in the large bottom block, framed in cool colors.
This block has a narrow sashing strip of black fabric with dog bones. I meant to put it in the top block, but I made them on separate days, and I forgot to use it. Oh well. I think I prefer the asymmetry it offers; otherwise the two blocks would be too similar.
Here's the back. I used the black bone fabric for the sleeve and the binding. It was really old, so I was glad to use most of it up.
The label.
The label is a pocket, with a card tucked inside.
Inside the card, I taped this cartoon from Rubes, which I call Poker Tails. (Be sure you click on the link so you can read the cartoon.)
The excited tail thumping of the dog in the cartoon brings to mind the perky, wagging tails of the dogs in the quilt. I suppose the quilt should be called Not Poker Tails, but that sounds odd.
This is my favorite cookie jar. I found it at an antique store about 15 miles away, didn't buy it, and as soon as I got home I had buyer's remorse. I called them and had them hold it for me, then ran back the next day and bought it.
It looks like I'm not the only one that likes it.