Some people work well with multiple projects going on at the same time, but I'm not one of them. So how is it I find myself in the midst of four of them?
I never did finish that iron caddy for my quilt retreat, because I found out the room we were using already came equipped with irons and ironing boards. I'm still working on my fabric challenge quilt. And I stuck my Aneela Hoey embroidery pieces on the back burner because I don't like how one of them turned out.
So why start something new?
- I fell in love with this Schnitzel and Boo mini quilt that Nicole from Modern Handcraft made.
- I bought another 3-drawer plastic container for my scraps, so now all the containers are the same size. Moving my purples from the small one to the large one reminded me that I need to get going on more scrap projects.
- Ergo, why not put the two ideas together and start my own mini hexi quilt?
I'm using these precut paper pieces, nice and simple. I might as well use all 100 of them in the one quilt. I already made 14 in a few hours, which includes TV watchng time. Making the other 86 won't take that long.
I also have two other packages: one is 3/4" and the other is 1 1/2". The size refers to the length of one of the straight lines.
The paper is nice and sturdy and can be used multiple times.
The directions said to "leave the tails wagging". While I appreciated the dog/cat metaphor, I wasn't sure what they meant. This is my interpretation - no knots, just dangling threads on the outside which will make it easy to remove the basting stitch.
The only problem I can think of is that I'm not going to be sewing these together. Instead, I'll be appliquéing them onto a background fabric, with white space between each hexi. How do I get the paper out without ruining the hexagon shape? I guess I'll iron it nice and flat before removing the basting stitch, then carefully take it out.
If that doesn't work, I'll go look at my Hexa-Go-Go book and see what they have to say.
I bought this ceramic Sheepdog a few summers ago at a flea market. The first time I looked at it, I passed on it, but I couldn't get it out of my mind so I swung back to that booth and bought it.
The head comes off - you can see the separation right above the collar. It's only 8 inches tall, too small for a cookie jar. And you wouldn't want to handle it too much for fear of dropping and breaking it. But you can swivel the head every which way to help him keep track of what's going on.
It didn't take long at all to come up with an arrangement for the bow tie blocks, maybe 10 minutes. I didn't even use a camera. I kept thinking about the 90 minutes I once spent arranging quilt blocks for a different quilt that I was giving away to a charity. Each arrangement was approximately 1% better or worse than the previous one. I didn't want to waste time like that again.
With this fabric selection, fairly high contrast with the cream linen, the bow ties connect to make snowball blocks that are quite visible.
I was extremely surprised at how well all my corners matched. How did I manage to do that?
Now I'm off to add the borders, then piece the back. I'm a little conflicted about the backing. Part of me wants to use some big hunks of fabric that don't really go with the front, but it would be easy because minimal piecing is involved. The other part of me wants to make a back I'm proud of. I'm leaning toward the former - use up the big hunks, who cares, and save my energy for making fronts that I'm proud of.
Bow Ties is a new block for me. And this is the first time I've made a fabric challenge quilt. Might as well do two new things at the same time.
Yesterday I finished making the 36 blocks. The center one has the challenge fabric.
The challenge fabric didn't have many other colors in it, and I didn't want it to be the only dark fabric. So I used two other blacks which had more colors in them. Then I used all three of them to pull together my colors. I have to admit that they don't look too pulled together here.
Here they do. It must be the cream linen that's throwing me off.
These look OK together, except for maybe the purple one. Since I only had one 6" square of that fabric, it seemed destined for a scrappy quilt and its time has come.
These look really striking together. I don't like red, but I sure like it here.
And I love green, so I had to throw a lot of that in.
I'm using a pattern from 3 Times the Charm, and I think the whole idea behind it is that you're supposed to use all the squares from one charm pack. That probably would look better, but good luck finding any charm pack that goes with any challenge fabric. Of the 18 fabrics I'm using, 9 of them are from the same charm pack - the other 9 didn't work, so I took 9 from my stash.
I guess that's why they call it a challenge. Now I'll start moving these around and see if I can come up with something I like. Wish me luck.
Last Saturday I went to a retreat to work on a fabric challenge our guild is sponsoring.
This year's fabric is Juggling Summer Black, part of Moda's Zen Chic collection by Brigette Heitland.
These are the supporting fabrics I chose. It took me absolutely forever to settle on this collection. My first go was a selection of solids, second go was too scrappy. This one has lots that read as solids, yet the colors are punchy enough to hold their own.
Since there was so much black in the challenge fabric, I included two more fabrics with black.
The other thing that took forever was picking a pattern. I decided to go with one from this book, but not the cover quilt.
I chose a bow-tie pattern, so each of the tiny 1 1/2" squares needed a diagonal line drawn on them. These are just a few of the 72 that are required. I cut 80 so I have more blocks to play around with in the setting.
Here is some of the chain piecing, where you can clearly see the wheat-colored linen I'm using for the background.
Even though the quilt is small (about 30" square), there's still a lot of pieces so it will take a bit of time. I have a feeling the hard part is going to be arranging and rearranging the blocks. I better have the camera ready so I can be sure to go back to my favorite arrangement.
I'm going to a quilting retreat on Saturday and bought a new iron for the occasion. My "home" iron is one I really like and I don't want to drop/break it. It's just a regular old Norelco that I've had for over fifteen years, but it's nice and heavy and solid. It's so old that it's the kind that takes distilled water. I never have to run it through the cleaning cycle that the new iron requires.
This is the new one. It's not a travel iron per se; it's full size. But since it's the one that gets to leave the house, I call it a travel iron. It literally weighs half what my other iron weighs, so that's nice for carrying.
I had one goal - to spend $10. Last year I saw irons that cheap at Menards, and I liked the sound of it. It leaves more money to buy fabric, don't you know. But yesterday I was closer to Shopko, so I stopped in there instead.
They had none for $10, but three that were on sale for under $20. The cheapest iron was weird and flimsy. This one was perfect for me, and not just because it was pretty.
When comparing irons, you have to take them out of their box and turn their dials
and flip their lids, etc. before you make your decision.
This iron had my four must-haves:
- A sturdy plastic cover for the watering hole. This one easily flips up and down and is securely attached to the iron. I spent a lot of money once on a Rowenta travel iron and it had a flexible cover attached by a little band that broke after a year or so, and the cheapest iron had the same thing. By the way, that entire Rowenta iron broke shortly after its band broke - what a waste of money.
- A mechanism to turn steam on or off (the grey lever in the photograph). I didn't even know it was possible to NOT have such a thing until I looked at the cheapest iron.
- A smoothly turning dial with fabric temperatures clearly labeled. The cheapest iron had numbers on its dial, then a chart printed elsewhere on the iron that cross-referenced the numbers to fabric types. Plus the dial was on the handle and I could hardly turn it. This dial turns smoothly and makes little snicking noises. I like that sound effect and sometimes I turn the dial back and forth just for the fun of it.
- Clear indication when the iron is off. This has the word "off" and a red button. Plus it automatically shuts off after 30 minutes.


I bought this cute little water bottle to go with it. It should work really good for transporting water and then filling the iron without spilling water all over the place. On the whole, I got a pretty good deal for all this, less than $22.50 including tax.
Now I need to make an iron caddy. I found a free pattern on the Internet that is a caddy when folded, but an ironing surface when open. That's going to be my next project.
So far, so good in 2015. In I See a Pattern Here, I talked about getting energized after filling the envelopes on my To-Do List quilt. I also showed four similar patterns, and decided to make one of them.
Nine days after that post and I have a new quilt. That's fast for me.
It's 16.5" x 40". I had to downsize it from the pattern to make it fit a narrow niche that I was going to hang it in. I did some math and figured that cutting the strips at 2" instead of 2.5" would work perfectly. Well, it worked perfectly for one direction, but not the other because of a different number of seams. Of course, I didn't discover this until most of the pieces were cut out.
As it turns out, I decided to hang this quilt in another location, so I could have gone with the pattern's measurements after all.
Illusions is the pattern I used. It was more complicated than I thought, and even though the directions and illustrations were excellent, I still managed to goof up and had to do some rework.
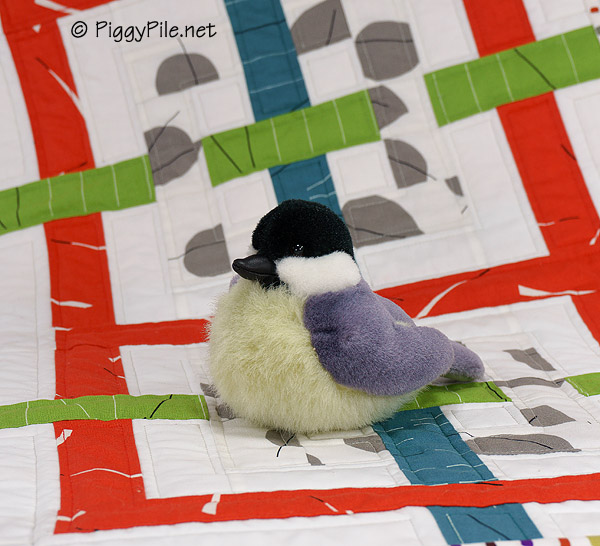
I named my quilt Birch Illusions because the fabric reminds me of a Birch tree, and Illusions is the name of the pattern.
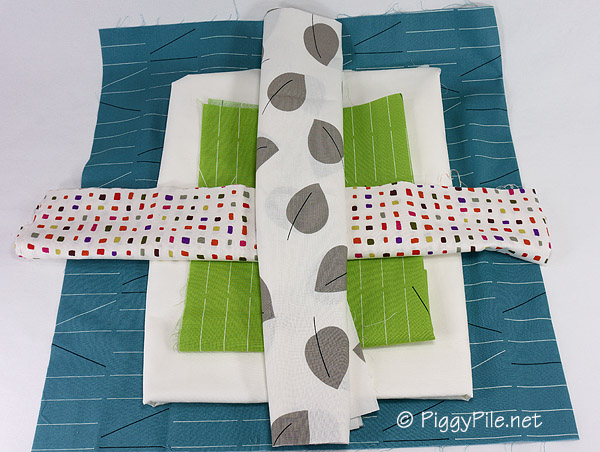
Before I did any cutting, I auditioned several layouts. Abstractly, the quilt has white sashing around two squares, and two intersecting lines. So I laid out the fabric like this to get a quick visual impression and then took photographs to see which of them I liked the best.
This was one of my rejects.
Another try, another reject.
Ditto. I also tried about 15 other combinations.
The winner, clearly showing my three favorite colors (orange, teal, and green). Even though the inner square sort of disappears at times because of the grey/white leaves, it adds to the illusionary nature of the quilt. The same thing happened with the dotted fabric for the binding - you can see that in some areas you can't even see the dots, just white space.
For the quilting, I did echo stitching.
I used up I'm-tired-of-these fabrics from my stash on the back. Part of the quilt was made with a strip set, and I turned the leftover piece into my label.
Boy, that was fun. The more I sew, the more I want to sew. Tomorrow I'll start another something new.
I was running some errands the other day, and not really in the mood for it, either. Then I realized one of my stops was next to a bookstore, so I added that to my errand list. Good call on my part! It made the whole trip worthwhile.
Are you a fan of Jo Packham? She brings us lots of books and magazines in the series "Where Women Create". If you like cooking, she has another series related to that, too. I've looked at most of her books through the library, but this one was new to me and so good I had to buy it.
I like Quilters: Their Quilts, Their Studios, Their Stories for three reasons:
- The focus is on quilters. Other "studio" magazines show other types of artists, but my favorite studios belong to quilters.
- It not only has studios, but like the subtitle says, it has the quilts and stories of the quilters.
- It's filled with lots of modern quilters: Amy Butler, Heather Grant, Alissa Haight Carlton, Tula Pink, Victoria Findlay Wolfe, and my favorite, Brigette Heitland. And lots of others!!
I know Quilts from the House of Tula Pink isn't a new book. I've been looking at it ever since it came out 3 years ago, and I even checked it out of the library twice. Someone in my quilt guild made that cover quilt and it was so beautiful in person that it stuck in my subconscious. When I found the book again the other day, I finally couldn't resist.
I like the Fall 2014 issue of Modern Quilts Unlimited for three reasons:
- It only cost $7.99. I have a really hard time paying $12 or $15 for magazines like so many of them cost nowadays.
- It has a large section on modern applique.
- It has a paper-pieced feather pattern.
Regarding the feather pattern, you might be very familiar with Anna Maria Horner's beautiful (and free) feather pattern. I put it on my to-do list for this year, but decided that it would be easier if I just drafted my own paper-pieced pattern that was similar. With the paper-pieced pattern in this magazine, my life just got easier. Granted, it's not the same as Anna's, but I can make it work.
This beautiful back cover of Modern Quilts Unlimited was a nice surprise when I got home.
I already own volumes 2 and 6 of Quiltmaker's 100 Blocks. When I filled the envelopes on my To-Do List Quilt, I found lots of blocks that I liked in those two issues, and decided I needed more of this series. When I found volume 10, I snatched it up. These magazines are such a great value - 100 patterns for only $6.99.
I like the variety of techniques used to construct the blocks. There's regular piecing, but also applique, paper piecing, and mixed technique.
So it's really, really cold this week, which means walks are shorter. That's OK, because it leaves more time for sewing. Off to it!