Thursday, August 11, 2016

One Bad Block Changes the Setting

I'm making a quilt with flying geese blocks.


Originally, I was going to make this pattern, exactly as shown.  But I couldn't figure out how to make their one-seam flying geese, so I decided to paper piece them instead.

That was the first step on my deviation.  I (almost) made thirteen geese blocks, just like in the picture.   I was still OK with the alternating geese and solid blocks, but not too fond of the borders.  So I knew my quilt wouldn't look exactly like this one.


Remember when I said I ALMOST made thirteen blocks?  I made a bad block.  In the two "not" areas, I didn't have enough fabric.  I noticed it on the bottom one first, and thought I could squeak by with a seam allowance of 1/8".  I decided that was a better alternative than ripping out seams, particularly since I didn't notice the problem until after I had the upper white triangle sewn on.

Mistake number two happened when sewing one of the top orange triangles.  You can see that the alignment is way off on the left and the top.  But what you can't see is that it would have left an upper seam allowance of only 1/16".  It was at this point I decided I didn't really need thirteen blocks.  And also, around this time, my percolating subconscious already knew it didn't like the alternating block setting.  So maybe it was subconcious subterfuge.


Now I'm thinking of something like this for the setting.  The inverted V shape looks more like a flock of flying geese.  

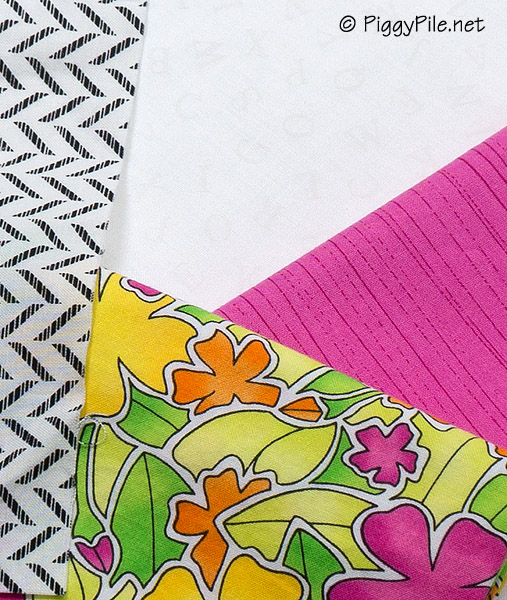
You see that peacock fabric peeking out on the left?  It was my focus fabric, but now I don't think I'll be using it on the front.  I might use a variety of white fabrics instead.  If I used the peacocks, the geese wouldn't stand out as much.  

I'm grateful to the peacock fabric because it determined my color palette, which I think is pretty.  I'll probably use it on the back, and have a completely bird-themed and color-coordinated quilt. 


Thursday, August 4, 2016

Quicker By the Dozen

Today I started robotic assembly of my flying geese blocks.  I can't really call it chain piecing, because I'm doing paper piecing and the seams don't start and stop at the edge of the paper.   But the concept is the same - faster piecing.

It's working really well.  After several hours, the twelve blocks are half done.

Monday, August 1, 2016

Monday Is Fun Day - Tree Silhouettes

Brass tree from a thrift shop.  Background artwork by Kelli Busch.  Frame from HomeGoods.

Sunday, July 31, 2016

Ready to Fly

When I made that first flying geese block yesterday, I was trying to be very careful.  

Usually when I paper piece, I just take a huge chunk of fabric, and wind up with a lot of waste.  In this Alex Anderson book, she has you cut the fabric ahead of time.  That could be useful, but my experience is that when directions have you do that, they are pretty stingy with the dimensions.  I need lots of slop room when I paper piece.

I enlarged the pattern, but didn't take that into account when cutting the fabric.  Don't ask me why.  (Maybe because I did those tasks on different days.)  Anyhow, good thing I only cut enough for one block.  But it worked out fine - instead of cutting squares into four triangles, I cut them into two.  Voila - just the right amount of extra.  Whew!


I'd like the other blocks to go faster, so today I cut out all the fabric.  Instead of making one block at a time, I'll sew the same seam on all twelve blocks, then trim that seam to 1/4" on all twelve, then press all twelve, then sew the next seam.

That ought to make these geese fly.


Saturday, July 30, 2016

Four Perfect Geese

I made the right choice in going with a paper-pieced block for flying geese.


Just perfect.

I decided to keep all the geese white and use five different colored fabrics for the background.  One down, twelve to go.


Thursday, July 28, 2016

Hybrid Geese

I never did start that lamp mini quilt.  I've been doing lots of outside projects this summer instead of sewing and blogging.  And every time I thought about that lamp pattern, I realized it no longer held my interest. 

But now I feel like sewing again, so what will I work on?


You see that pattern in the lower left?  I picked fabric for it a couple of months ago, so I decided that would be a good project.  You see how it says "sew simple" at the top?  And "triple easy" at the bottom?  

After I (tried to) read the directions, I was reminded of the "hilarious" label that gets slapped on comedy DVDs.  I have yet to watch one described as hilarious that came close to the build up.  So when I see that word on a DVD, I'm not fooled.  And when I see "simple" on a pattern, I feel the same way.

Their way of making one-seam flying geese was too complicated for me.  Plus the block was too big, and I'm mathematically challenged when it comes to resizing blocks.

Segue to Plan B.  You see the nice smiley Alex Anderson book?  She has a perfect (for me) flying geese paper pieced pattern.  I'm going to enlarge it a little bit after I scan it.  Then I'll use the setting from the Sew Simple Patterns, or a variation on it.  Voila - hybrid geese.


This is my focus fabric, which I'll use for the large solid rectangles.


These are the other fabrics.  Right now, I plan on white geese, with the colored fabrics as background.  I suppose I should try one with a white background and colored geese.  Come to think about it, why couldn't I mix it up and use both?  Then I'd really have some hybrid geese.


Sunday, June 26, 2016

Next Project - Paper Pieced Lamp

Once upon a time in a magazine, I saw a bookcase decorated with items consisting of a distinct color on each shelf.  I liked it so much that I did something similar in my set of cubbies.  

Each column has items of one color - aqua, pink, orange, and green. And each row has the same type of items - books, mini quilts, accessories, etc. 

A few weeks ago, I stole the pink mini-quilt from one of the cubbies (indexed as Column Pink, Row Mini-Quilt) to put someplace else.  Now I need a replacement. 


After all the trouble my boutique apron gave me, I wanted something simple for my next project, so I'm going to make a quilt out of just one block, that of a paper-pieced lamp. 

These are the fabrics for the lamp.  The columns aren't entirely monochromatic, so I think it'll be OK that I chose a floral that isn't totally pink.

The white fabric is a faint text print.  I thought that was suitable for a lamp theme.


This will be the first, but not last, block I'll be making from Penny Layman's The Paper-Pieced Home.


Tuesday, June 21, 2016

Boutique Apron Is Finished

Yesterday I finished my Boutique Apron, made from McCall's pattern M6132My mannequin was previously wearing a paper pieced portable mixer apron, but the colors no longer worked in my sewing room.  I needed something pink.


I call this a Boutique Apron because the bottom fabric has lots of different boutiques, one of which is a shoe store.  One of the options for the apron featured a shoe on the bib, so the boutique fabric was perfect.


The back has cross ties that go through loops at the waist.  I cut the ties too short, before I realized all the real estate they had to traverse before they got tied in a bow.  So now that everything is completely done, you can see there's not enough length for a bow.

The apron is fully lined - first time I ever saw an apron like that.  It makes it seem more substantial and professional, even if my mannequin is the only one who'll be wearing it.


I ran into a little problem once I put the apron on the mannequin.  The angle of the tie coming off the bib was not conducive to going up over the shoulder.  The tie wanted to go way out to the side, like if you were holding your arms out at shoulder level.  

The only thing I can think of that would have caused it is when I sewed the tie on, maybe I was supposed to align the curve 180 degrees opposite of what I did.  Then the curve would have been up towards the neck.  That would have been a nice hint to put in the directions.  Way too late now.


To fix it, I made little pleats and sewed buttons on to hold the pleats in place.

The pattern called for a button on the ankle strap.  I also added a button on the bow.

Now I'm ready for a new project, but I don't know what it will be yet.  I hope it won't have any surprises in it.


Monday, June 20, 2016

Monday Is Fun Day - Vintage Nut Container

What catches your eye when you're in a store?  For me, the first thing is color, then style, then function.  Kind of sad that function comes last, but that's the way it is.  And when I'm buying decorative accessories, those priorities seem OK to me.


Anything aqua, pink, or mint green gets my attention right away.  When it has more than one of those colors, even better.  

This is a vintage plastic box that somebody decorated.  I found it at my favorite "Parisian flea market".  It's 9" from one pointy edge to another.


It originally held a "deluxe nut mix", consisting of five kinds of nuts roasted in oil and salt, with an additional five chemicals as preservatives.  One of them is used to make polyester resins and is also used as an aircraft de-icing fluid.  Hmm. 


The gold inner border is original - I can tell based on the scuffing.  The paper and spiffy pink flower are recent additions.


This is how I display it on a bookshelf.


Friday, June 17, 2016

Making It Mine - Vintage Floral Lamp

Making It Mine is about buying a new or vintage item and changing it up to make it mine.


This was my latest project - a lamp base from an antique store.  The sign said "it works" which was good to know, since it was missing some parts.  Just to be sure, I had them try it out with a light bulb before I bought it.

As you can tell, the main thing missing is a lamp shade.


Another thing missing was the knob to turn it on and off.  Luckily it was in the "on" position when they put the bulb in.  Who wants to turn a lamp on and off with needlenose pliers?  Not me.


When I took the lamp to the hardware store to see if they sold knobs that would fit, they told me there was a piece missing from the center, too.  You're not supposed to have just that piece of cardboard.


The hardware store man found a lamp kit, opened it, added the gold center part and put on the knob.  How easy was that?  

I still needed a shade, though.  As you can tell from this picture, it probably originally had a glass globe for a shade, sort of like what goes on a hurricane lamp.


The store didn't have the right globular shape that I needed.  I didn't like the skinny clear ones they had, either.  I liked the looks of this pendant shade, though, so that's what I bought.


Here's what it looks like now.  The shade is not the right proportion, but the color is nice.  And that circular band looks a little odd, but so what.  It's definitely not as matchy matchy as it would have been with the original shade.

When I turned the knob, I got a nice surprise: there's a bulb in the base.  So with one click, the base turns on, with two clicks it turns off and the top bulb turns on, and with three clicks you get both.  I like the lamp even more now.


Tuesday, June 14, 2016

Almost Done with Boutique Apron

I'm ALMOST done with my boutique apron.


Last week I sewed the bib to the bottom.  That curved seam taught me a little something about multiple 5/8" marks on my sewing machine.


Today I made the straps and sewed them on.  They attach to the top of the bib, cross over on the back, and go through loops.  There are lots of nice touches like that on this apron pattern.

The straps are 43" long, and it took a long time to turn them inside out after sewing the seam.  The pattern had them at 53" but I cut them down before I realized how they would be used.  I thought they were just going on the waist and therefore were ridiculously long.  But even after trimming, I think they'll still work out.  I hope, anyhow, because it's too late now.  Guess I should have read the directions before cutting.


Today I also made these little loops and sewed them on.  They're located at the waist and they're what the straps will get pulled through.   They started as a 2" x 4" rectangle, then you sewed a 3/8" seam and were supposed to turn them inside out.  2" turned into 1" when folded in half, then after a 3/8" seam allowance, you had a 5/8" hole to pull the fabric through.  Hmmph.

After a short frustrating try at that, I threw them out, cut new rectangles and went to Plan B:  Fold under 3/8" on each edge, then fold in half with wrong sides together and sew along the edge.  Much easier!


When I sewed the bib to the bottom, the curve made it hard to match the outer edges.  I didn't feel like tearing it out and starting over, because of all the easing on the curve.  So when I put the lining on, I'll just smooth everything out.

And that will be the last step - add the lining.


Monday, June 13, 2016

Monday Is Fun Day - Elephant Pin Cushion

Here's another from my collection of vintage ceramics turned into pin cushions.  I gravitate towards animals, but only certain kinds.  Up to now it's been only cats and dogs.


  But now I'm excited to welcome this cute elephant.


It lives in this little shadow box with elephant button "pictures" on the wall.