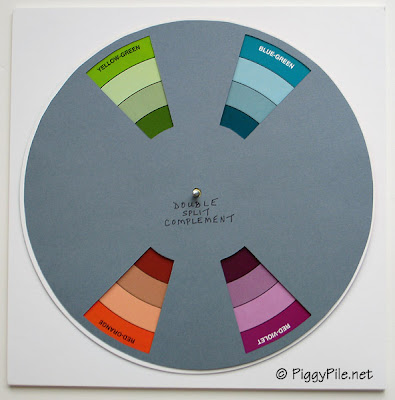
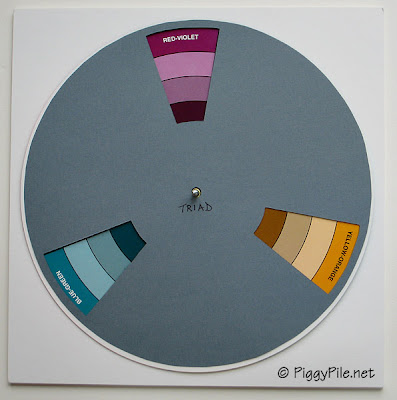
Debbie walked us through the process of creating blinders for a color wheel. I'm not sure that blinders is the right word, but it's a way to block out all the colors on a color wheel, except for the ones that are part of a particular color scheme. This weekend I made my set of blinders and want to share the process with you.
All you need is a color wheel and eight pieces of scrapbook paper in a neutral shade (either black, white, or grey). I found this exact same color wheel at Wisconsin Craft Market, JoAnn Fabric, and Michaels, all at the same price. So it's just a matter of who has the best coupon.
Remove the white template from the color wheel and tape it to the back of your paper. This white template is going to be the pattern for tracing the various color schemes, one per paper. Use a pencil (so you don't gunk up the edges of the pattern) and trace around the outer edge of the circle.
Then pick a color scheme and trace the wedges that belong to it. Notice that the pattern has two rings of wedges: a larger one close to the center and a smaller one close to the edge. However, you are going to cut one big wedge, not two separate ones. This means you don't have to trace around the thin white arc that separates the two parts of a wedge.
See that small hole in the center? Trace that also.
Here you can see (barely - sorry!) the marks for Tetrad. There are gaps on the straight lines where the thin white arc of the pattern is. You don't need to connect the lines, just line up a straight edge and use an X-acto blade to cut through the paper. You have to freehand cut the arcs. I used scissors to trim the outer edge of the circle.
Here is Tetrad after it's been cut out. Isn't it cute? Looks like an old-fashioned fan blade. See the little hole in the center? That's really important, so don't skip that step.
This is what I'm calling the blinder. You can see the logic in these things. Sure, the color wheel has little arrows that point at the wedges for Complementary, Triad, etc. But you can still see ALL the wedges on the color wheel, so how useful is that? Answer: not very.
To stack the blinders on the color wheel, I (my husband, if truth be told) made a base out of three layers of matt board, 10-inches square. Attach two layers together with high-quality double-stick tape. These two layers make it nice and sturdy. Drill a hole through the center of these two layers and insert a flat-headed screw from the back side. Then attach the third layer of matt board with more double-stick tape. This layer covers up the screw head and makes a nice-looking back.
Place your color wheel (without the white pattern) over the screw. You can attach the color wheel to the matt board if you want. I didn't because I want to occasionally look at the back side of it which talks about mixing colors. Then you're all set to overlay the color wheel with whichever blinder you're interested in.
Make as many of these blinders as you want, and label them. I'm going to show you eight.
 |
| Analogous |
 |
| Analogous Complement |
 |
| Complement |
 |
| Double Complement |
 |
| Double Split Complement |
 |
| Split Complement |
 |
| Triad |
 |
| Tetrad |
It cost me $5.79 in materials for the color wheel and scrapbook paper. I had a 50%-off coupon for the color wheel and the paper was on sale for 5 sheets for $1. Only the grey was on sale - that's why I used grey. We already had the matt board and screw so I'm considering that free. Time to make? Just a few hours.
I encourage you to make your own. It's not as hard as I thought it would be. Spinning the various blinders and seeing all the different color combinations is FUN! Enjoy!!
And thank you Anne and Debbie!!!!


No comments:
Post a Comment
Your comment won't display immediately.