Filigree is another 12-inch square quilt with an autumn theme. I made five of these little quilts this summer and decided everything about little quilts appealed to me. I like littleness. I like completing one project before moving on to the next. These little quilts come together in a matter of days, so you don't get tired of working on them and find yourself tempted to start another, theoretically more fun, quilt. You can get goofy/silly with them all the easier because the small size isn't intimidating.
Filigree isn't a goofy/silly quilt, although I do have a couple of them coming up in the next month or so.
Filigree was so named because I wanted to evoke the sense of a decomposing leaf with its framework of veins left behind. This quilt is fused, reverse applique. I traced the leaf shape on the back of the multi-color batik, then carefully cut it out. The multi-batik was then fused to the green batik. I free-motioned "veins" on the leaf and did echo quilting on the background.
The background batik feels like it drew all the layers of pigment from the leaf and the sky and then just dropped them, higgeldy-piggeldy.
Now it's playing a supporting role, along with its friend, Autumn As It Oughta Be, to the multi-colored kalanchoe.
Each Tuesday I'll be
featuring a vignette of tea-related items. Most of them will have one
of my teapots; they all have at least one thing you could use at a tea
party.
That dog has the attitude and the attire to fit right in at a tea party. I think it has better manners than the little girl who looks like trouble, if you ask me.
Some friends and I meet regularly to discuss all things quilt-related. Last month we started exploring color and amidst our talented group, two volunteers shared their knowledge. Anne Alessi talked us through the various color schemes and how colors interact with each other, giving us the benefit of her years of experience dyeing fabric.
Debbie walked us through the process of creating blinders for a color wheel. I'm not sure that blinders is the right word, but it's a way to block out all the colors on a color wheel, except for the ones that are part of a particular color scheme. This weekend I made my set of blinders and want to share the process with you.
All you need is a color wheel and eight pieces of scrapbook paper in a neutral shade (either black, white, or grey). I found this exact same color wheel at Wisconsin Craft Market, JoAnn Fabric, and Michaels, all at the same price. So it's just a matter of who has the best coupon.
Remove the white template from the color wheel and tape it to the back of your paper. This white template is going to be the pattern for tracing the various color schemes, one per paper. Use a pencil (so you don't gunk up the edges of the pattern) and trace around the outer edge of the circle.
Then pick a color scheme and trace the wedges that belong to it. Notice that the pattern has two rings of wedges: a larger one close to the center and a smaller one close to the edge. However, you are going to cut one big wedge, not two separate ones. This means you don't have to trace around the thin white arc that separates the two parts of a wedge.
See that small hole in the center? Trace that also.
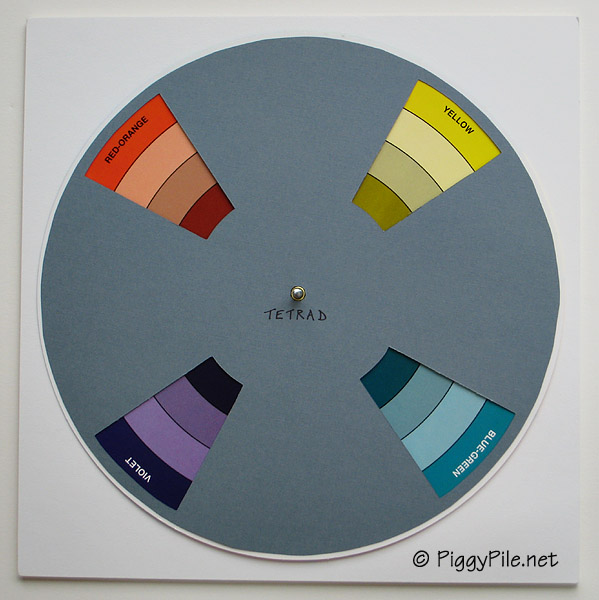
Here you can see (barely - sorry!) the marks for Tetrad. There are gaps on the straight lines where the thin white arc of the pattern is. You don't need to connect the lines, just line up a straight edge and use an X-acto blade to cut through the paper. You have to freehand cut the arcs. I used scissors to trim the outer edge of the circle.
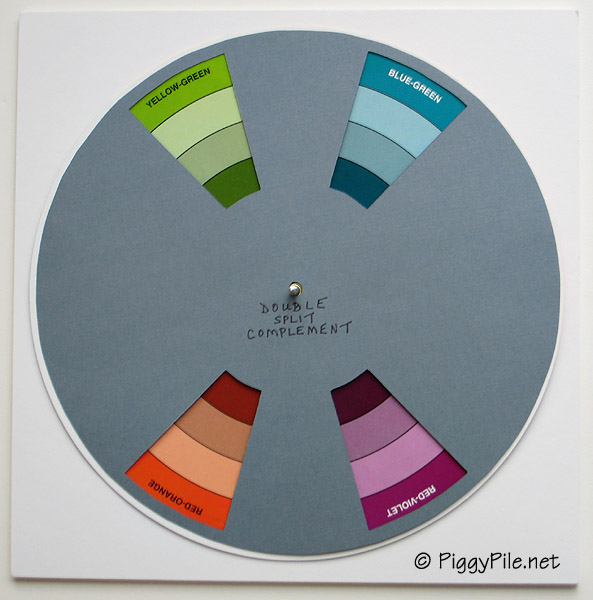
Here is Tetrad after it's been cut out. Isn't it cute? Looks like an old-fashioned fan blade. See the little hole in the center? That's really important, so don't skip that step.
This is what I'm calling the blinder. You can see the logic in these things. Sure, the color wheel has little arrows that point at the wedges for Complementary, Triad, etc. But you can still see ALL the wedges on the color wheel, so how useful is that? Answer: not very.
To stack the blinders on the color wheel, I (my husband, if truth be told) made a base out of three layers of matt board, 10-inches square. Attach two layers together with high-quality double-stick tape. These two layers make it nice and sturdy. Drill a hole through the center of these two layers and insert a flat-headed screw from the back side. Then attach the third layer of matt board with more double-stick tape. This layer covers up the screw head and makes a nice-looking back.
Place your color wheel (without the white pattern) over the screw. You can attach the color wheel to the matt board if you want. I didn't because I want to occasionally look at the back side of it which talks about mixing colors. Then you're all set to overlay the color wheel with whichever blinder you're interested in.
Make as many of these blinders as you want, and label them. I'm going to show you eight.
 |
| Analogous |
Analogous is at least three adjacent colors.
 |
| Analogous Complement |
Analogous Complement is at least four colors. It includes analogous and the complement of the middle color in the analogous run.
 |
| Complement |
Complement is any two colors opposite each other. I don't know why they don't just call this one Opposite. That's what I would do if I was in charge of the names.
 |
| Double Complement |
Double Complement is two adjacent colors and their complements.
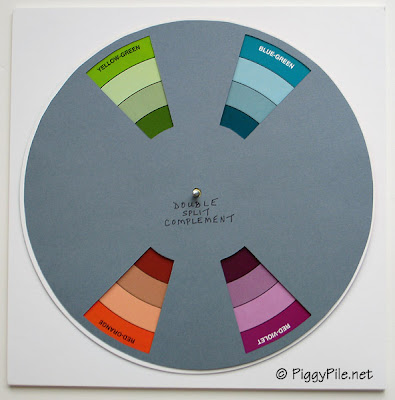 |
| Double Split Complement |
Double Split Complement is also four colors, but each pair is not adjacent. One color separates each pair.
 |
| Split Complement |
Split Complement is three colors. Select one color, then instead of taking its complement, take the two colors adjacent to the complement.
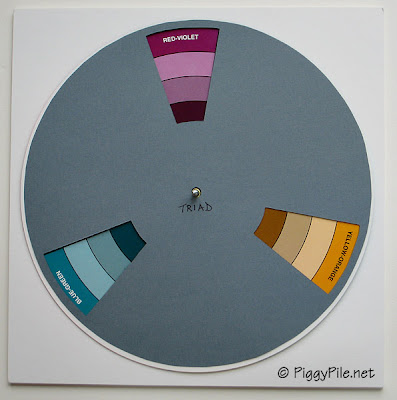 |
| Triad |
Triad is any three colors evenly spaced around the color wheel.
 |
| Tetrad |
Tetrad is four colors evenly spaced around the color wheel.
It cost me $5.79 in materials for the color wheel and scrapbook paper. I had a 50%-off coupon for the color wheel and the paper was on sale for 5 sheets for $1. Only the grey was on sale - that's why I used grey. We already had the matt board and screw so I'm considering that free. Time to make? Just a few hours.
I encourage you to make your own. It's not as hard as I thought it would be. Spinning the various blinders and seeing all the different color combinations is FUN! Enjoy!!
And thank you Anne and Debbie!!!!
Each Sunday, I'll take a
break from the material aspects of this blog and spend a little time
looking at the finer points of pigdom. Most people probably appreciate
the ham and bacon side of pigs; little do they know they have a deeper
side as well.
We'll start the week with a peek into the favorite quotes
of thoughtful pigs and also learn a pig factoid (pigoid?) in a feature
called Pigipedia.
PIGIPEDIA
The smallest breed of pig is the Pygmy Hog, which lives in the Himalayan foothills of India. Full-grown, they can weigh as little as thirteen pounds, are around twenty-three inches long, and have a one-inch tail. This is about the size and weight of a watermelon, if a watermelon had a tail. They are one of the most endangered species of mammals, with only about 100 remaining.
Each Thursday I'll
feature items that have a similar theme. They might be quilts, books,
or purses I made. Or, they might be ceramics or other objects (not made
by me) related to the theme. If there are too many, I'll spread them
out over multiple, but not always consecutive, posts.
Once upon a time I listened to a Career Track audio seminar called Life by Design. The part that stayed with me the most is the story of the energy pie. As Dr. Rick Brinkman explains, each of us starts the day with an energy pie. Some mornings it is as small as a dinner mint and we spend it all just getting out of bed. His point is that you can increase the size of your energy pie by doing things throughout the day that are exciting, fulfilling, restful, meaningful - anything that gets you charged up. So if you wake up "on the wrong side of the bed", so to speak, don't let that set the tone for the rest of your day!
Sometimes when you're going to do a little baking, you want to wear an apron. This is my Tomato Apron. It's more than OK to wear Tomato Apron when baking pies, because tomatoes are the perfect "androgynous" food. They are a metaphor for pies that can be made with either fruits (apple, blueberry, etc.) or vegetables (pumpkin, sweet potato, etc).
Botanically speaking, tomatoes are fruit. However, the Supreme Court (Nix v. Hedden, 1893) considers them a vegetable. The Tariff Act of March 3, 1883 required that taxes be paid on imported vegetables, but not on imported fruit. The Nix family filed suit to recover back duties paid under protest. They argued that since tomatoes are botanically fruit, they are not subject to the tariff. The Supreme Court unanimously ruled that the "common" definitions of fruits and vegetables should apply. Since most people consider tomatoes a vegetable, Nix lost.
If one is in the mood to wear an apron when baking, one might also be in the mood to go in a full-out old-fashioned mode by sifting the flour and then mixing the dough with a manual egg beater. The sifter is from my super-exciting vintage weekend shopping last month. The egg beater came from my ironing board trip.
Just the thing to store/bake your apple pie in.
And don't forget about feeding your energy pie!
I'll be going to my first quilt retreat pretty soon and I decided I needed a teeny little iron to go with my square ironing pad. I used to have a super-cute teeny Rowenta iron but it died way too soon. Not going down that trail again! So late last week I went to countless stores looking for just the right iron. I didn't find anything even close to what I wanted, and I'm not buying an iron online; I need to pick it up, wave it around, and see how many holes it has on the sole plate. I gave up for now.
To cheer myself up, I thought I should do some antique shopping. So even though I don't have a new iron, I do have two new (old) ironing boards. I needed them to do some character improvement in my sewing room.
I was beside myself when I found this children's ironing board. It was in really good shape, just a few minor scratches on top and some missing rubber feet. Here you see it with some of my finds from my super-exciting vintage weekend shopping last month.
This is my new full-size wooden ironing board that is really, really, really old. Well, maybe not that old. But from the 1920s or 1930s, I'm pretty sure. It was refinished, which to some people destroys the value, but to me it made it valuable. I don't want a stinky rough old ironing board. I want a nice smooth rich-looking one. The woman that sold it to me said she was a teacher and she takes out her frustrations by refinishing furniture.
No, this isn't a sled. It's my folded-up ironing board. Look at the beautiful large nail heads. Look at the luscious caramel color. It's very smooth and soft, too.
Here it is in use.
And finally, here's my chair recovered with one of the birthday presents I bought from The Sewcial Lounge.