Wednesday, September 30, 2015

Plum Millie - the Plan

I didn't think I did much sewing last month.  I thought I got burnt out when speed-making Positivity Crayons.  But when checking my records, I see I finished that quilt in mid-August and since then I made 

As soon as I finished that cushion last week, I decided it was time for a fall re-do in my sewing room.  Out went the stool and vanity and almost everything that was pink.  It's not that I'm fickle - after all, that fabric and trim were laid out on the stool all summer long, so I had many months of looking at it as if it were done.


I was looking for fresh inspiration, and this vintage tray was it.  Funny thing is that when I bought this tray several summers ago at a county flea market, the vendor was also selling vintage fabric that coordinated perfectly.  I don't like buying old fabric, so I passed, much to the disappointment of the vendor.


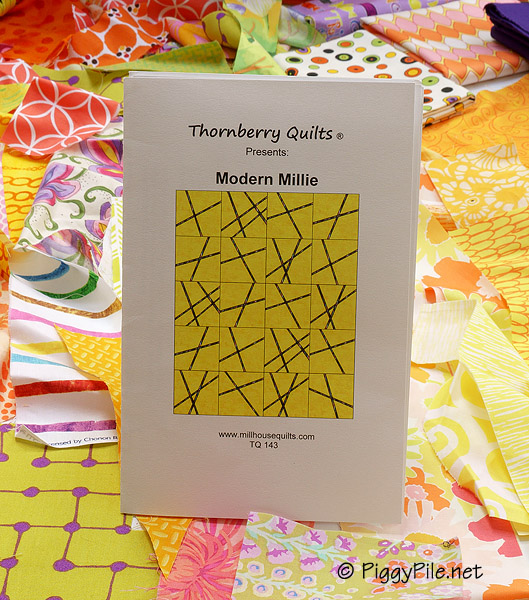
So here's my current project  - another version of this quilt.  My first version, Wild Millie, is still in my sewing room, covering a chair.  As part of the re-do, I flipped it over to show the side with all the inserted strips.  All summer long, I was looking at the back side.

A group of us from my quilt guild are getting together later this month to make this.  This time I hope to have all the blocks made ahead of time, so that I can spend our retreat time doing the quilting.


For my new version, all the blocks will have the same background fabric - the rich purple that you see in the upper right.  That's why I'm calling this one Plum Millie.

For the insert strips, I'm going to piece these scraps and see how far they'll take me.  These are the only scraps in pink, yellow, orange, and purple that I like.  I might have to seriously evaluate the rest of my scraps and see how many of them I want to keep.  The drawers are getting full, and why keep fabric I don't want?

If I don't have enough "good" scraps, then I have some yardage in these colors that will work well.


To keep the color scheme going, I picked up a few blooming plants to sit on the end of my work table.

Now, on to quilt making!


Monday, September 28, 2015

Monday is Fun Day - Vintage Pencil Holder

I think it was intended to be a vase, but now it holds my pens and pencils.

Wednesday, September 23, 2015

Making It Mine - Pink Vanity Stool

Early this summer at a resale shop, I bought a vintage pink metal stool, perfect for a vanity table.


I liked the color alot, so I left it alone.  It came with a sort of creepy and icky old cushion, which I left behind at the store.  Of course I wanted to make a brand new one myself.


My sewing room has a yellow / orange / pink color scheme.  To go with the retro stool, I chose Lazy Daisy Raspberry from Jeni Baker's Dreamin' Vintage collection.   And because I like sparkle, I used this little bit of trim from my trim stash.


I used a piece of foam I had laying around in the basement, and made a pillowcase cover that I hand-stitched shut on one short end.  


I hand-stitched the trim on, as well.  I used a backstitch to give one continuous line of stitching.


I have it sitting with a vintage vanity table that I bought at a garage sale early this spring.  I'm liking brass this year, and the brass-legged, mirrored, formaica vanity table struck my fancy.  First came the table, then the stool.

I bought the table to be a plant stand on my deck.  And it lived out there with my bird cage for over a month.  But it was so pretty and I felt bad that it was getting so beat up in the rain, so I brought it inside into my sewing room.  Kind of an unusual thing to have in a sewing room, but I think the pair of them are pretty, so that makes them welcome. And the airy, curvy legs don't take up much visual weight in the room.

This stool and my ironing board cover were the last two little projects that were hanging over my head.  Now I have a clean slate and I'm excited to plan some new projects.


Tuesday, September 15, 2015

Flower Power Ironing Board Cover

There's three things I like a lot about my ironing board:
  1. It's mechanically very sound.
  2. It's orange.
  3. And the cover is nice and thick.  
 There was only one thing I didn't like, and that was the worn state of the cover.   That's easy to fix.


All I needed was two yards of this colorful fabric and a ball of twine.  

There were many beautiful fabrics I could have chosen, but since I'm keeping the old cover underneath, I made sure the new fabric was dark enough that it wouldn't allow for any "show through".


There are lots of tutorials online, and I chose two.  

Make It Handmade has a shortcut where you just drape the fabric over the ironing board and cut it that way, instead of flipping the ironing board upside down on your fabric and tracing the size you need.  I was going to try that part, and use an alternative to her bias tape casing, but I was nervous about freehand cutting, so I didn't use her tutorial after all.  But her drape-and-cut method is a great idea and I might try it in the future.

Momtastic was the tutorial I used for the most part.  I have a large work table, so it wasn't a problem to flip my ironing board onto the fabric to do the tracing.  Instead of a bias tape casing, her's is done by folding and stitching the edge of your fabric.  Two things I did differently from her tutorial:  I used string instead of elastic, and I used a bodkin instead of a safety pin to pull the string through the casing.


It was super easy to make, which is good.  I redecorate my sewing room a lot, so it won't be a problem to make a new cover next time I use a different color scheme.


Monday, September 14, 2015

Monday is Fun Day - Dog Tape Measure

Last week I added a new tape measure to my small collection.


 Tug on the dog bone to pull out the tape measure.


And push on the spot to retrieve it.


Saturday, September 12, 2015

Elephant Tree

I bought a bottle tree this summer, then promptly broke the main stalk when assembling it.  I felt bad for a short time, until I realized it would be the perfect way to display the little elephants I made last summer. 


I had my husband make a stand for the shortened tree, then I put it in a ceramic pot and filled it with small rocks.  Instead of a bottle tree, it's now an elephant tree.

The hanging elephants are from Heidi Boyd's Stitched Whimsy.   So is the pink felt elephant at the base of the tree, which I showed you last September.


The ears and tail are made of felt.  Sometimes I used a patterned piece of felt for the inner ear...


... and sometimes I used plain felt.


 Each elephant has a different type of embroidery on its ears.


It was fun to coordinate the ribbons and eyes with the elephant.  The eyes are shakeable - the pupil moves around if you move the elephant.


This is the only elephant with a different type of eye.  I used a button and placed a small eye inside it.

These elephants were an awful lot of fun to make.  I think I only stopped making them because I didn't know what I was going to do with them or where to put them.  One year later, they have a perfect home.


Tuesday, September 8, 2015

Ready for Reading

I finished the cover for my reading chair this week.  It's ready for reading, which is just what I've been doing.


Here you can see the mostly solid seat cover.  I think it makes a nice transitional landing spot between the striped back cushion and the floral ottoman.

The loose pillowcase-style cover for the back cushion is nicely informal and was super easy to make.  I'll definitely make that style again when it's time for another redo.  But that will have to wait until the next time I fall in love with another ottoman.


Monday, September 7, 2015

Monday is Fun Day - Coloring Station

My Positivity Crayons quilt is back home.  Hanging it necessitated a partial room makeover.


I thought it would be fun to create a coloring station underneath it.


I was going to call it a crayon station; I like the sound of that because it rhymes with train station.  But I have more than crayons here - I have Prismacolor pencils and a 50-pack of Crayola Super Tip washable markers.

Everything is within fingertip reach of a small desk.  All I have to do is turn around and grab.  How fun.

Sunday, September 6, 2015

Progress on My Reading Chair

For some reason I thought I would be able to make the back and seat covers for my reading chair in one day.  I don't know that it's possible to do an entire sewing project in one day, unless it's a very small project.  But I guess it makes me happy to think a project is a snap - if I thought at the outset it would take much longer than I'd like it to take, I'd get discouraged.  The extra making time isn't too bad, though, because it's just plain fun to sew.


I have the seat completely done, and the covering for the back is 95% done.  This is the back, all in a squirmy pile.


To build the two covers, I brought the cushions and the ottoman down into my sewing room.  Then I cut a bunch of strips and started arranging them until I found the order I wanted.  All of the strips came from fat quarters, which as you can see aren't wide enough to cover the cushion.


This is the 95%-completed piece for the chair back.  It's over 5 feet long.

You can see that I added cream muslin vertical borders to increase the width.  To make things a little different, I added some strips that overflowed into the side columns that the muslin was making.  Note the gold/purple near the top and in the center, and the pink at the bottom.  Some of the strips have a little muslin spliced in for unification.

Alas, it was still just a little too narrow, so I added a 2" strip of small pieces along both edges. 


Here's the fabric draped over the back cushion.  Once upon a time I made a different cover for this chair, and I used a zipper.  Ugh, ugh, and more ugh.  The cushion isn't a rectangle - it has a swoopy, arched top.  Even putting the zipper on that long end didn't work.


This time around I decided I'm going to make a "pillowcase" and just slip it over the top.  That's the 5% I have to do yet - hem the bottom and stitch the side seams.


For the seat, I debated using some large squares.  I didn't want more rectangles, because I thought that would look too busy right next to the ottoman (bottom of photo).  However, this fabric selection was rejected - still too busy.

While we're here - note that the seat cushion also has a swoopy arch, this time at the front, where your knees go.


What I chose for the seat was a large center panel of one fat quarter, uncut - that gold fabric on the left.  Then I bordered it with 1/2 yard of the dark navy.  When you see the finished product, you'll see what a good choice this turned out to be.  

Since I didn't have any more of those two fabrics, but still needed to make it larger in order to cover the bottom of the seat cushion, I added that dark teal / white herringbone around the edges.  Not because it looked wonderful together, but because I had 1/2 yard of it.  You're not going to be seeing this portion in the finished product anyway, so it's OK.

I don't always dress to match my sewing project, but maybe I should start doing so.


To handle the swoopy seat cushion, I wrapped it tightly, like a package, and used those screwy upholstery pins to hold everything tight.

I think after I put the "pillowcase" over the chair back, I'll use the screwy pins to hold the bottom edges pulled tight together.  But that's for another day.